User Manual
Accessing the Provenance Enabled System
To access the Provenance Enabled System, you will have to first authenticate yourself to the system. This can be done by navigating to the "Provenance" option in the
menu bar and selecting "Start".Once you select start, the following screen will be displayed:

In this screen, you will first select "Cloud Server" from the dropdown list (If it is enabled).
Then you will enter the login credentials.
To test the connectivity of the server, you can use the "Ping" button.
To connect to the system, you will use the "Connect" button.
Once the credentials have been validated, you will be shown the following home screen:

Creating a Provenance Enabled Document
In the home screen, select "Create Provenance Document" option. You will be directed to the following screen:

In this screen, enter the document title and select the users with whom you want to share the document.Also select those users who are allowed to audit this document.
Once you are done, click on the "Create" button.
Once the document is created, you will get a new blank document.
Opening a document for Edit
After successful authentication, you will be in the home screen.
In the home screen, select "Edit Proveance Document" option. You will be directed to the following screen which will list the available documents.

Select the desired document and click on the "Load" button to load the document for editing.
Once your done editing the document, you can save it by pressing the Save button in Open Office or by using the shortcut Control + S.
Opening a document for Audit
After successful authentication, you will be in the home screen.
In the home screen, select "Audit Proveance Document" option. You will be directed to the following screen which will list the available documents.
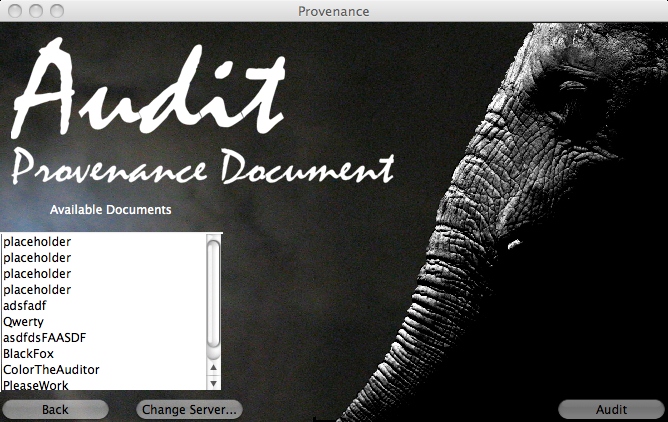
Select the document to audit and click on the "Audit" button. You will then get a screen similar to the one below :
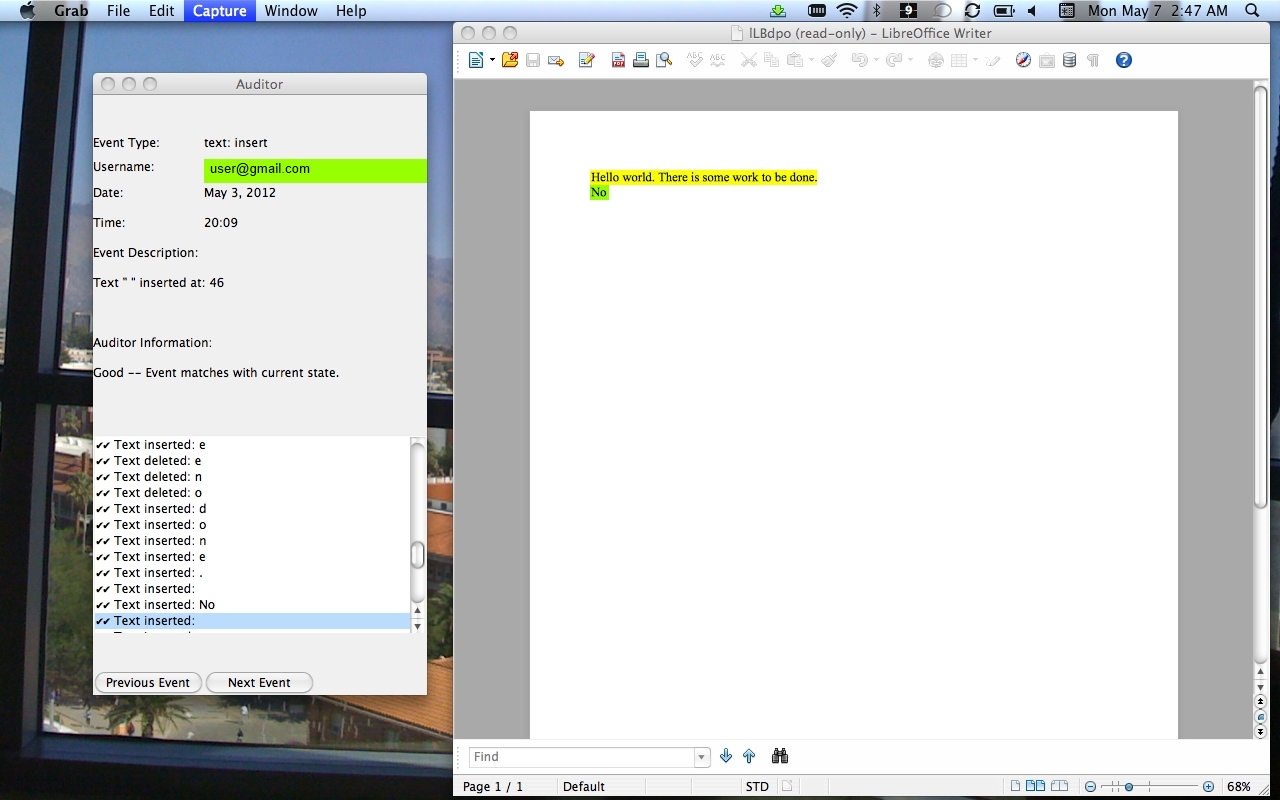
You can use the "Next Event" and "Previous Event" buttons to navigate through the events and verify its integrity and evolution.